Showing posts with label Frugal. Show all posts

Monday, March 4, 2013

Kick out the cold . . and keep the warmth in!: Door Covering

So we are in the process of winterizing our apartment, and while there isn't a ton we can do being this isn't a place we own, we are trying to do all we can to keep our heat. . .

Today, I made door bottom covers. I know you're thinking of those hideous weiner dogs that grandma always used to cover the bottom of the door and yelled at everyone that walked in to make sure they went back in place at the foot of the door. . . and yes this is essentially the same thing, with a twist.

I can't stand those frufru goofy dog shapes! they always seemed tacky to me and what's worse with people trapsing back and forth in and out of the house they always got wet and sometimes they'd start to either mold or get musty which all in all made them awful smelling. Plus they never stayed with the door and putting them back every time the door opens is a pain! Enter my solution:

The door cover is actually attached to the door by looping the button holes in the fabric over command hooks attached to the door, it's neutral to keep my tacky-hating design self happy, and it's fully washable! Essentially it's a bag, a little longer than the door (to cover the edges) that you stuff with sand or plastic bags or blankets (basically whatever you feel like stuffing it with) and hang on the door. Keeps the cold out, Stays in place automatically and when it's gross it goes in the washing machine!

and here's how to make it:

Take any fabric that you sorta like (durable is preferred) and an old dead pair of blue jeans.

Cut out a length of your blue jeans to 3 inches wide and about same length as the door plus 4 inches.

Cut a length of your favored fabric to about 2 1/2 foot wide and the length of your door (plus 4 in)

Turn the fabric down on the long sides about 1 1/2 inches and sew the edge down.

Take your ruler and measure 7 inches in on either side and make a vertical line on the hems you have just sewn. Then measure 7-10 inches in from each mark (depending on your door) and make another vertical line. What you should have now is eight vertical lines total on the two sides of the fabric toward the top of the door. These are the marks for your button holes.

You should now re-enforce all of the surrounding fabric by sewing a box around the line (make sure to hit the outer edge twice on your machine!) Then take a razor blade and slice the line to finish your button hole.

Now to re-enforce the bottom (So the wear and tear won't tear your bottom as easy!) You'll need to make a wide bias tape out of the denim strip. in the very middle (in between your hems) make a mark all the way across.You'll want the denim bias to follow  that line precisely. Sew it down.

Now with the wrong side of your fabric out line up your button holes. Sew the ends and reenforce the seams well. Turn your project right side out. Fill with your desired stuffing about half full.

Now to hang it on the door!

What are you doing this winter to keep out the cold?

Saturday, February 23, 2013

Living More Simply: Dishwashing


Ah the dish washing chore. People around here, ok I, despise washing dishes. I thought that the dishwasher was God's gift to me, and people like me. Until I did some math and some real evaluating.

Have you ever noticed how much work a dishwasher really is? Really unless you have that stellar reputation of person who rinses and loads the dishwasher the very second after the dish is dirty, you have to scrub your dishes before they go in the dishwasher, or as everyone has witnessed from time to time the entire load ends up with crummy yucky stuff plastered to it.

Now that alone, seems like extra work to me. Usually if I've rinsed my dishes well enough to put them in the dishwasher I might has well have added the soap and they'd be clean by the time they got there! Seems like I just wasted time!

After pondering that, I started looking at all those things I cannot wash in my dishwasher. My pans. aren't the pans the worst part of the dishes? Couple that with the fact that most pans, especially those with any kind of non-stick coating, are not dishwasher safe, so if you are putting these things in the dishwasher you are voiding your warranties and not guaranteeing the safety of your pots and pans. The cast iron that I use often, can't be dishwasher-ed unless I want to re-season them every time I cook. Not a real useful thing.

Looking around at that I started wondering if there was more that I wasn't seeing. We stopped using the dishwasher and started washing ALL of our dishes by hand. I mean I was essentially doing that anyways! We stuck a towel on the counter and used that to lay dishes out to dry and after a month, lo and behold our electric bill was TWENTY DOLLARS cheaper! I never in my wildest dreams thought that the dishwasher could possibly eat up that much money!

After a few months of watching our electric bill being consistently cheaper, my husband had an assignment for his environmental science class to measure the amount of energy you used on a daily bases for something like four days. Now I had no idea you could actually calculate this total! I know I must be blonde right? (actually red-head, worse than blonde!) We did the math our dishwasher eats up 120 volts at 8.5 amps, meaning it eats up 1020 watts (volts times amps) while it's running.  If I did the other math properly (hours of use times current cost of electricity) with running the dishwasher once a day (about an hour) it eats approximately 17 dollars or electricity a month, not including the gas to heat the water it uses. So my totals were not that far off!

Looking at the hand washing method, I can safely assume that the amount of energy to heat three to five gallons of water that I use while hand washing (and sometimes used while rinsing and loading the dishwasher anyways) is significantly less than the dishwasher eats up. While I can't calculate for the water usage as we don't pay for water where we are at currently, I still would guess that it doesn't cost as much because I was using the water to rinse the dishes before they went into the dishwasher anyways. All in all for our family washing the dishes by hand is far simpler than washing them with the machine. As an added bonus my dishes have never been cleaner!

Now I'm not saying go out and tape off your dishwasher, never use it again. That would be crazy! But, if you are interested in living with less work and using less energy, it might be time to evaluate your dishwashers actual potential. Are you getting the bang for your buck? Turns out, we weren't!


Wednesday, February 20, 2013

Combining and Condensing: Baby Clothes Edition

Over the past few months we as a family have been condensing and ridding ourselves of the excess stuff that has accumulated just about everywhere we look.

The other day I decided to tackle the baby clothes pile. We regularly sort through toys  and remove excess toys from the bin, but the baby clothes get a little overwhelming. Every month or so I'm sorting new clothes in and out of their dressers since my girls are so little and my system my lovely system, falls dreadfully short. Here is just one example of how:

This photo is of all the clothes that my kiddo's grew out of that should have been in the hands of someone else in need, some of them over 1 year ago. There are actually six boxes under that pile!

When you look at that pile, you might think that my girls must be running around naked right now. Nope, in fact, they both have boxes of growing into clothes waiting for them still and dressers still annoyingly packed to the brim.

But today, I am laying out for you my system.

We are blessed to have several families giving us some amazing clothing and we hardly ever have to buy clothes for our girls. But if we were to keep everything we get right off the bat my girls would wear a new outfit every single day (some of them I really wouldn't like!) and still not make it through all the clothes before they grew out of that size.

So we start as soon as we get a new set of clothes, We go through all the clothes with our girls in mind, would I ever consider putting my child in this shirt? If no it goes in the blessing pile, if yes it goes in a box for them to grow into. When it comes to my kiddo's since they are born in different seasons I have to watch what I keep and save because chances are if I'm sorting their clothes they won't transfer over to the next kid!

I then go through the keep pile again and make sure that everything will be worn, and that it fits into the box, I only allow myself to keep 1 box of each size (sometimes less than that!) and it has to work for both girls! Once that is finished we determine where the blessing box is going. Sometimes, unfortunately, we can't find a family that needs them and in that case it goes to the nearest Salvation Army, but we do try first to see if there is a family that can use the clothing.

When I am dressing the girls and I find that clothes don't fit, they get tossed into a bag hanging in the closet to be sorted the same way as the new clothes. I re-evaluate every item once again so that we are not storing useless items. Since we plan on having more children, I keep clothing after the youngest as well albeit in much lesser quantities.


About every two months I do a massive dresser dump and I sort, clean up, and size up their dressers. anything that's too small goes into the evaluate bag all the stuff that fits gets neatly folded and returned to it's drawer and the box of clothes to be grown into next moves into the dresser and becomes the  box for the set of clothes coming out.

Does it seem like a lot of stuff and sorting? Yeah it does to me too!! That is why I've limited myself so much that 6 months of clothing they have grown out of literally fits in one box now! The more we go through things the more I am realizing how little of their clothing actually gets worn! Why do I hold onto sixty shirts when my daughters will wear the same five over and over?

Do you have a system for your kids clothing? Share it!

Like this post? Stay tuned more condense and combine articles are coming!

Thursday, January 31, 2013

Complimentary Heart Mobile for my Valentine

 
This year I decided that I wanted to do something different for valentines. I mean really My husband is the love of my heart on more than just valentines day right. So I'm extending valentines to include the first two weeks of February. While I think it is extremely important to make sure he knows how special he is to me on a regular basis. This is my opportunity to make a big deal out of it . . so I am.

Every day for 14 days I plan to add a string of "complimentary" hearts to the mobile. Each string contains 3 compliments for my sweetheart. 3 things I like about him. 3 things he's good at. 3 feelings towards him. You get the idea. Each is written on it's own paper shaped heart and they are strung together and they will be tied to the mobile I made out of pipe cleaners and string.

I kinda made this halfway before I decided to post it, so I'll explain how it was done as well as I can . . .

The mobile itself is a circle formed from pipe cleaners twisted together with string tied at four points along it and tied to a longer string in the center of the circle. I added some ribbon for fun.


Then I cut out paper hearts, you know the method you used in elementary school of folding paper in half and cutting teardrop shapes. Yup that's how it's done.

Next each heart got a compliment.

Then I poked holes in them and tied three to a string.

Over the next two weeks I will be tying them to the mobile 1 day at a time.

How are you planning to celebrate your Valentine this Valentine's Day?

Sunday, December 9, 2012

Indoor Kid Fishing Sets


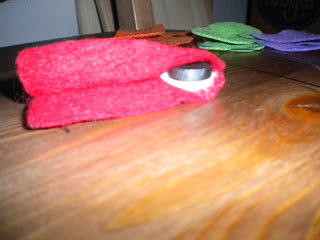
So this Christmas me being the crazy person I am, decided to make magnetic fishing sets for all the kids in our lives for Christmas (they are all under the age of 5) They actually were quite fun to make! Here are the individual pieces :o)
The Fish:
I cut a fish body out of felt and a few circles and triangles for eyes and fins. I sewed all of these together and stuffed them with Fiberfil. I made a braided loop with jute and glued a magnet into the edge. I then sewed the loop into the mouth of the fish to give kids two ways to catch the fish. They can be caught by the magnet or by the loop.


The Pole:
I had my amazing husband saw a couple of these bamboo garden stakes in two pieces (about 2.5-3 foot each) after sanding off the rough edges I wrapped the bottom (handle) in jute using hot glue to put a “grip” on the pole. Then I tied (and glued) a long piece of jute for the fishing line.
The Hook:
This was quite the challenge! I needed something that wasn’t going to cause severe damage if it was flung by a kid, be able to house a magnet and not be sharp edged like a traditional fishhook would be. I tried salt dough but my husband’s uncle (my kids’ godfather) proved that that wasn’t going to cut it by dropping it and watching it shatter into pieces. He then quickly twisted a hook out of thick copper wire that was almost perfect! The Magnet had to be wedged into the ends of the wire and wrapped in jute to hide, but the copper works well, is light, no sharp edges and well looks good!

The Bag:
My Simple Produce Bag pattern only made out of muslin and measured to the length of the pole.
Ta Da!! Full fishing sets for the babies!

Monday, December 3, 2012

Sprouted Wheat Pancakes and Berry Syrup


It's recipe time!
I've been experimenting with buttermilk pancakes for a few months now and I think we've finally hit a recipe that tastes good and has the healthy aspects we like. . . And if you top it with yummy berry syrup, it makes an awesome breakfast!


Sprouted Whole Wheat Pancakes

1 1/4 Cups Sprouted Whole Wheat Flour
1/4 Tsp. Sea Salt
1/4 Tsp. Baking Soda
1-3 Tbsp. Honey (to sweetness preference)
1 1/3 Cup Buttermilk
1 Egg
2-3 Tbsp. Butter- Melted

Mix together Flour Salt and Baking Soda in a medium bowl. Drizzle with Honey. In a seperate container beat together Egg, buttermilk and butter (make sure the butter isn't too hot!). Mix together and drop by 1/4 cup (or smaller if you prefer, I make "baby" drip pancakes for the kiddo) onto a hot greased skillet or griddle. Once the top is slightly "bubbly" (see photo below) flip them, they should be perfectly browned on the bottom. Cook until the two sides match. Top with Syrup (Berry recipe below) and whip cream or butter.

Berry Syrup/ Sauce

1/2 cup- 1 cup Berries
a touch of water
3 Tbsp Honey or Maple Syrup per 1/2 cup of berries

Simmer on Medium-Low until pancakes are ready and berries are soft.


Pancakes are definately a favorite breakfast around here!

Thursday, November 15, 2012

Banana Ice Cream

Pictures to come next time I make this stuff . . .  :o)

Ok, to be fair calling this stuff ice cream isn't exactly right, cause it's not. But it's good and cold and healthy and my kiddo eats this as her ice cream . . It has no added sugars, fats, or preservatives and is loaded with nutrients so it fits into my standards for her health diet.

You ready? Ok those bananas on your counter, peel them and throw them in the freezer. The more ripe the banana the more banana flavor to have less bananayness freeze them a little on the green side.

Once they are frozen chunk them into your blender.
Sprinkle with unsweetened cocoa powder or vanilla if desired (I use about 1/2 tsp per 3 bananas)
Splash with milk and blend to desired consistency adding milk as necessary.

That's it! Easy Peasy Lemon Squeezy! Enjoy with the kiddo's or pop in the freezer and store for later like you would traditional ice cream.

What kind of natural and healthy desserts do you feed your kids? Do they enjoy them as much as traditional dessert?

Tuesday, November 13, 2012

Felt Magnet ABC’s


Somewhere on Pinterest (I can’t remember where or I’d point you there) I found a post for these adorable felt letters to help kids learn their letters. When I saw these I instantly thought how awesome would it be to have fridge letter magnets that wouldn’t leave dents in foreheads when kids got mad and threw them at each other? So I decided to take it one step farther and make felt stuffed fridge magnet letters! 

I started with different colored pieces of felt and cut fat letter shapes (two of each letter) out of the felt. I then hand sewed the edges using a blanket stitch. I made sure that as I was sewing them together I stuffed them with polyfil and a magnet.


I know I know sounds so simple and easy. It’s not. It’s painstaking and tedious but . . . 

They turned out so adorable! Don’t you just love them?

Monday, November 5, 2012

Our Favorite Oatmeal

This oatmeal is warm and tasty and it's a fall favorite of ours. It seems like there are so many oatmeal recipes, but this one is by far our favorite.

1 cup boiling water
1 cup Milk
1 1/2 cups Rolled Oats (or Quick Oats)
1/3 cup cranberries
1/3 cup chopped nuts (we usually do almonds)
1/3 cup or less brown sugar (sweetened to taste kinda)
A tiny bit of maple syrup

It's an easy peasy recipe this recipe I make. Boiling water in pot, add milk. stir till combined and warm. Add oats. Combine Well. I usually let the oats simmer while I prep the nuts
I then add the nuts berries and sugar. . .

Mix it all together well . . Split between our bowls. . .
Pour on some syrup and enjoy! Simple right?

What are your family's favorite oatmeal recipe's?

Tuesday, October 30, 2012

Excellent Salted Pumpkin Seeds

Ahh! Fall is here, pumpkins, falling leaves, pumpkins, acorn squash, pumpkins, leaf fights, pumpkins, thankfulness; did I mention pumpkins?

We love everything pumpkin around here this time of year, or at least I do. I make pumpkin pie, pumpkin spice latte's, pumpkin cream cheese muffins, pumpkin bread, and pumpkin seeds. Oh there are a million more recipes, but these are by far our favorites. While I will most likely post more about the other recipes later on, today is about the seeds.

Aside from storing them for planting next summer, one of the best uses for those seeds after you carve out your pumpkins is a treat for, well, most of the people I know. Salty, buttery, snack pumpkin seeds.

So without further ado here is my recipe for pumpkin seeds

You will need:

1- 1 1/2 cup of Pumpkin Seeds (about two carving pumpkins worth)
1 1/2 tbsp Sea Salt (Divided)
3 tbsp Butter (we use Homemade)
water to fill pot to 1/2 full

A small sauce pot
A Colander (or a lot of patience)
A cookie sheet (with or without tin foil cover)
An Oven or Toaster Oven

Bring 1/2 pot of water to boil. Reduce Heat. Add 1 tbsp of your sea salt. Add seeds. Boil for about 15-20 minutes stirring occasionally.
Drain and rinse your Pumpkin Seeds in cool water (colander is really helpful for this)
Melt your butter into the pot you just used. Add remaining salt to the butter.
Toss your seeds back in the pot and cook on medium low in the salty butter for about 3 minutes.
Dump the whole pot, butter and all onto a cookie sheet, lined with foil makes for easy clean up but isn't necessary. Spread out to approximately single layer.
Pop in the oven at 300 Degrees. Stir about every 10 minutes. Usually it only takes about 35 minutes to get the crispy golden seeds.
Let Cool.
Enjoy!

Boiling the seeds sucks the salty ness into the seeds and makes them a bit more flavorful than if you were to simply rinse them and bake them. We have also done seasoned seeds in the same manner and they turn out just as great! Experiment for yourself!

What kind of pumpkin treats do you like? Have you made pumpkin seeds before? What are your favorite methods?

Saturday, October 27, 2012

Making Sweet Butter


Sweet Butter is one of the easiest things to make, and yet often one of the things most people would rather buy. Although we have no access to Raw Milk right now and therefore no cultured butter, there are still a great deal of benefits to churning (or shaking) butter at home.

When you make it yourself you have the added benefit of knowing exactly what is in your butter. No natural flavors, no added coloring agents (such as Annatto), no added preservatives, oils, or nitrogen and if you trace where your milk comes from you can know that the milk isn't altered and is harvested from naturally raised cows.

Another great benefit is the limited processing allows for fresher butter which means more/better flavor.

If you have a raw milk supplier you can "culture" your cream and make cultured butter adding a great deal more nutritional value to your butter.

and finally .. . Drum roll please . . . . The Buttermilk. . . Oh how you will love the buttermilk! This milk is much better than any store bought buttermilk. Store bought buttermilk is often not buttermilk at all but rather fermented skim milk! http://en.wikipedia.org/wiki/Buttermilk
The buttermilk you get from churning your own butter is by far superior and makes excellent pancakes!

Although there are many methods of churning your own butter at home some using blenders and whisks, some with traditional churns, I've heard of people using stand mixers, we shake our butter.

As we use it quickly we don't usually worry too much about pressing the butter and we usually make it in small batches. This method is cake easy and really doesn't even require too much thought. Our whole family participate! Ok ok enough blabbing are you ready?


Get an empty jar with a tight sealing lid. We use old peanut butter jars most of the time.

Fill your jar 3/4 full of Heavy Whipping Cream (or fresh cultured cream)

Let the jar sit until the cream is room temperature.

Shake the snot out of it! You will notice as you shake that the cream will become very thick (the whip cream stage) and then almost suddenly it will start to clump together and there will be liquid swishing in the jar.

Congrats you have butter. You then just need to separate the butter and buttermilk.


Pour out the milk (save it for your pancakes tomorrow!) and keep shaking. Shake and pour, shake and pour until you can't get much more milk out of the butter.

Refrigerate or freeze both your Butter and Buttermilk. Or just enjoy it on some rolls right away. This butter will last anywhere from 3-6 days in refrigeration. If you need it to last longer you can press more milk out of the butter either using knives and wax paper or a butter press, or even washing the butter with water. We rarely do this as we use what we make quite quickly.

Bon Appetite!

What methods have you tried to make butter? What do you think of fresh butter?

Thursday, October 11, 2012

Simple Honey Wheat Bread


I love bread. Love it. But I have noticed that unless I buy the expensive organic bread I get sick. Like really bad. I think there is something wrong with the conventionally grown flour supply. I buy organic flour myself and the more I switch our grain items to organic the less allergy problems I end up struggling with. I don’t want to go back to having awful allergy problems but paying 4.89 for a loaf of bread is getting crazy!

I have decided to make my own. I mean why not people did it in the old days and I already buy all organic flour. I’ve even heard that soaking grains and baking your own bread is better for you. Although this isn’t a soaked bread recipe I plan to make it that way (or make soaked bread that is similar) soon. Anyways, this recipe turned out really well! Here goes!

2 Cups Warm Water
2 Cups Whole Wheat Flour
1 TBSP Active Dry Yeast
1 TSP Salt
1/3 Cup Honey
1/3 Cup Oil ( I used Olive Oil)
5 Cups All Purpose or Bread Flour ( I have worked  in a little more wheat flour alternatively)

Dissolve yeast in warm water. Add honey, and stir well. Mix in whole wheat flour, salt, and vegetable oil. Work all-purpose flour in gradually. I found that I actually had to knead some of the flour in, around cup 4 it starts getting really difficult to work in more flour!

Turn dough out onto a lightly floured surface, and knead for at least 10 to 15 minutes. When dough is smooth and elastic, place it in a well-oiled bowl. Turn it several times in the bowl to coat the surface of the dough, and cover with a damp cloth. 

Let rise in a warm place until doubled in bulk, about 45 minutes.

Punch down the dough. Shape into two loaves, and place into two well-greased 9 x 5 inch loaf pans. Allow to rise until dough is 1 to 1 1/2 inches above pans.

Bake at 375 degrees F (190 degrees C) for 25 to 30 minutes.